Thursday, September 30, 2010

'C' is for Cookie

My Grandad is going to heavily disapprove of our use of the word 'cookie' instead of 'biscuit', but hey it's 'C' week :-) Today we made these cardboard cookies for the C wall and Bubble had a stack of fun doing it.

WE USED:

* cardboard
* scissors
* child safe glue
* things to decorate your cookies (we used wood shavings, felt shapes, small pompoms and foam shapes. You could also use buttons, sequins, beads, coloured salt or sand, glitter - just about anything really!)

Cookies cut from cardboard ready to be 'iced'.

Our wood shaving 'chocolate'.

Circles cut from felt made great icing, paper would work just as well.


Yum! A whole plate full of cookies! :-)

'C' is for Carrot

Our second 'C' wall project was a wet string picture of, what else, a carrot :-)

WE USED:

* cardboard
* textas and pencils
* coloured paper
* tape
* wool/thick thread/twine
* childrens glue (we used Clag)
* something to mix glue in (we used a paper plate)

I drew a carrot onto some card, adding a few paper leaves taped on just to add interest, then drew an outline around the edge of the picture.

We put the wool onto our paper plate and covered it with glue until it was all goopy and thoroughly coated.

Then Bubble carefully laid her wet string around the outline.

Hammering Skills

Bubble and Squeak are really into tools at the moment since Daddy let them help put together some furniture. All of a sudden everything is being hammered with plastic hammers and every bolt is being inspected with little screwdrivers :-D To save our ears from the enthusiastic 'repairs' happening on the dollshouse roof I set up an activity which was (a little) quieter.

WE USED:

* an old box (shoebox or postage box is great)
* craft matchsticks (if using real ones just remove the heads first)
* sharp knife or ballpoint pen
* toy hammer or mallet (could also use building blocks or a soup ladle etc... if there are no hammers around)

Using the knife or pen make small holes wherever you like on the top of the box. Leave enough room for your child to manouvre their hand and hammer.

Push matchsticks into the holes so they just pierce through the lid of your box.


Bubble hammering in her 'nails'.

Bottle Lid Necklace (threading)

This activity was a big hit this afternoon, easy to make and set up and great for fine motor and co ordination development.

WE USED:

* milk bottle lids
* glue
* coloured pictures (we used old sticker books)
* scissors
* pen
* craft or paring knife
* pipecleaners
* thread/wool/string
* childsafe needle
* drinking straws

We used the covers of old sticker books for our pictures, but anything colourful like scrapbook or wrapping paper will work. The thicker the paper the better though. Use the lids to trace circles onto the pictures so that when they are cut out they fit inside perfectly.

Using your knife make a small hole in the side of each lid. Apply glue to the back of your pictures and secure inside the lids, making sure that the spot where you made the hole is at the top (this is where the pendant will be hung from). Some of our lids had bits inside preventing the pictures from being glued flat, but we found they pushed inside and stuck without being glued because of the ridges on the inner part of the lid.

I was very amused to see that out of all the pictures our maths loving Bubble chose the abacus as her favourite one :-D

Cut your pipecleaner into short lengths, then push an end through the hole in the side of your lid and twist closed (making sure to tuck in any sharp bits).


Cut your drinking straws into short lengths for threading.

You might like to tie the thread to your child's needle so that it doesnt come loose.

Bubble making her straw necklace.

If you cant find a child safe needle they are easy to make using pipe cleaners. Make a loop at one end of a cut pipecleaner and tie on your thread, then squash it to fit through your straws.

Our straw and milk bottle lid necklaces - beautiful!

Come play at the Childhood 101 We Play link up
We Play


Wednesday, September 29, 2010

Weather Changing Diorama

I made this simple diorama using an old postage box for the girls to learn more about weather . I used felt to create the weather elements because Im a bit of a felt loving freak, but they could easily be made using cardboard or paper instead. The pictures will demonstrate how it was made much better than I could describe it, but here is my attempt at instructions :-)
I opened the box up and tipped it on it's back, laying the lid down as the base. The bottom of the box (which is now the back) I painted with blue paint and the top was painted white and left to dry over night. I stuck a strip of adhesive velcro (the prickly side) across the top of the box to hold onto the weather hangers, but you could just use blutac if yours are made of paper or card.
Inside the box I just laid two sheets of green felt for the grass, cut a shape from blue felt for a pond, and a square of brown and yellow felt represented a sandpit. The road is from the fridge felt set we made last month. The weather hangers were just cut freehand from felt and have a strip sewn to the back so they can be attached to the diorama and changed easily. There is:

* a sun
* a moon and stars
* a white cloud
* a rain cloud
* lightning bolts that attach to the rain cloud
* a wind cloud

I hope I didnt make that all sound complicated because it really wasn't at all, it took a little over an hour to make it last night and the girls had hours of play with it today. We did imaginary play, used textas to add more scenery to the back of the box and talked a lot about weather and how it works. I'd like to add snow and a rainbow to our collection if I can find the time one night!

Our postage box diorama.

The top of the box - painted white with a strip of velcro (prickly side not soft) stuck across it.

The back of the box painted blue for the sky, and felt grass, pond, sandpit and road.

Bubble having a play.


Inside the diorama with the girl's wooden farm toys added.

Wind cloud.

The sun.

White cloud.

Oh dear, it's raining!

And now it's a thunder storm.

Quick Farmer, get out of the rain!


Uh oh, the wind blew the horse over (he was ok ;-D).

You can see here where the weather hangers attach onto the velcro strip on top of the box.

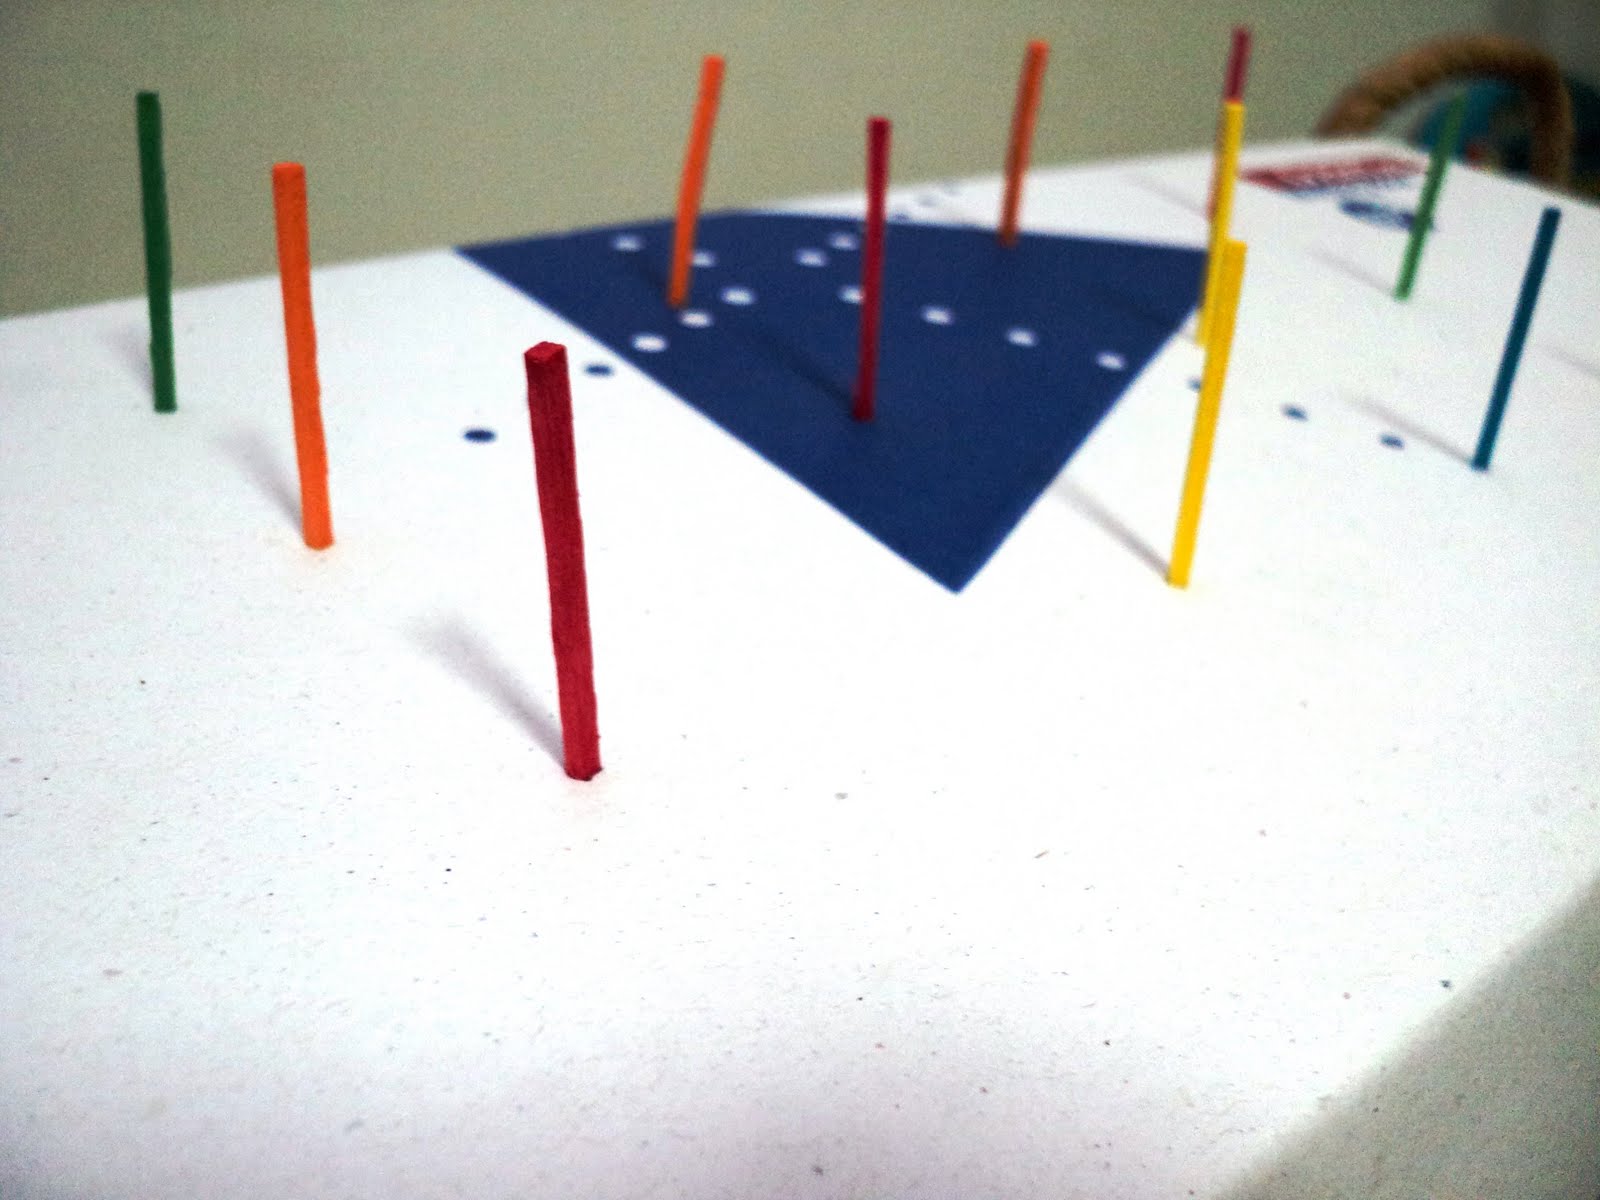
We ended up with quite an interesting weather forecast :-)

Tuesday, September 28, 2010

Coloured Sand Castles

WE USED:

* food colouring
* beach toys/buckets
* a beach! (or sandpit/table would also work)

We headed to the beach today and added a few drops of food colouring to the sand before we built our sandcastles - very fun! The girls loved building their colourful creations, and after we were finished all it took was a bucket of water poured over the top to wash the sand clean again.


A green aeroplane.

A red crab.


Sand washed clean after we were finished.

Please note: the girls did get some food colouring on their hands and clothes, both of which washed clean easily - just thought Id mention it as it may not wash out of more delicate clothing. Also (I know this goes without saying) please don't use anything other than food safe colouring on the sand if doing this at the beach like we did. Anything you mix in there will end up in the ocean eventually so make it safe :-)